Photo 1, 1a and 1b (top to bottom)
Use this tutorial for plates marked
072200 Revs A, A1, B, B1 and C.
The plates will resemble these but may vary in some respects. >
If the plates in your kit don't look at all like these, don't panic! Check the other tutorials for this model here.
All of these variations still work. Changes were made over time to accomodate differences in model years of the vehicles.
Top photo 1a - Plates marked with "072200 A or B" may be similar to this plate but may not have the enlarged square cutout on the right. This plate will only fit trucks having a lock cylinder on each front door. If the plate you have has the two square cutouts the same size, this plate will not fit on 2500/3500 trucks, but will still fit 1500 series trucks.
Middle photo 1b - Plates marked with "B" or "A1" or "B1" and look like this plate will fit trucks having lock cylinders on both front doors AND trucks having lock cylinders on the drivers door only. Will fit 1500, 2500 and 3500 series.
Bottom photo 1c - Plates marked "072200 C". will resemble this plate. We changed the area around the lock to the left to allow this plate to fit trucks with locks on each front door AND trucks with a lock only on the drivers door. Will fit 1500, 2500 and 3500 series.
In each photo, notice the square cutout area to the right is larger than the one in the center of the plate. This change was made to accomodate a difference in the door metal that appeared on the 2500/3500 trucks in 2003.

Above: This plate works for trucks having lock cylinders on both front
doors only!

Above: This plate works for trucks with lock on drivers door only OR
trucks having locks on both front doors.

Above: This plate works for trucks with lock on drivers door only OR
trucks having locks on both front doors.
Photo 2
The first photo shows a customers' brand new 2500 Ram 4x4 that was burglarized. Look closely below and slightly right of the lock cylinder for a small paint chip. This is where a screwdriver was forced into the door. Once inside, the screwdriver is used to move the lock rods and get into the truck. It is easy and takes about 10 seconds to open a door this way. That is why you need our product on your truck...
Installation Steps follow:
Shown is the driver side, but the passenger side installation is similar.
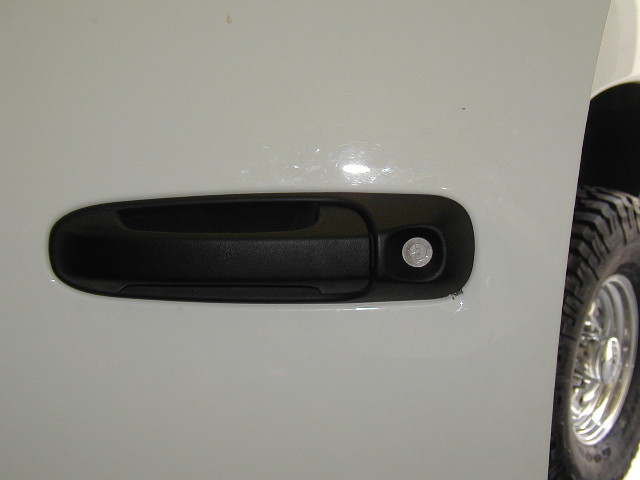
Photo 3 - If equipped with manual windows, remove the handle by releasing the c-clip behind the handle that holds it on the shaft. The window should be in the "UP" position for th entire installation.
If you don't have the tool to remove the clip, use an old Tshirt or shop rag and work the edge of the rag down onto the open end of the clip. (You should be able to peek behind the handle and see the clip ends by pushing the panel inward.) Work the rag back and forth and the clip will usually release. The tool is available at many auto parts stores if you can't get the rag trick to work.
Keep your hand or a rag around the handle base while trying to remove the clip. The clips tend to spring off and can go flying if not captured.
Pull the handle straight off the shaft. Once off, it is a good idea to put the C-clip back in place on the handle. You can snap it all the way on at this time.

Photo 4 (electric windows)
Make sure the window is in the UP position.
If you have electric windows, gently pry the window and lock switch module out of the panel. Pry straight up. Work carefully as to not damage any wires or components. Disconnect the switches. Watch for locking tabs on the connector housings.
Once the rest of the panel is loose, you may also be able to fish the module through the opening in the door panel and avoid disconnecting the wires, but sometimes this is harder than disconnecting the wires.
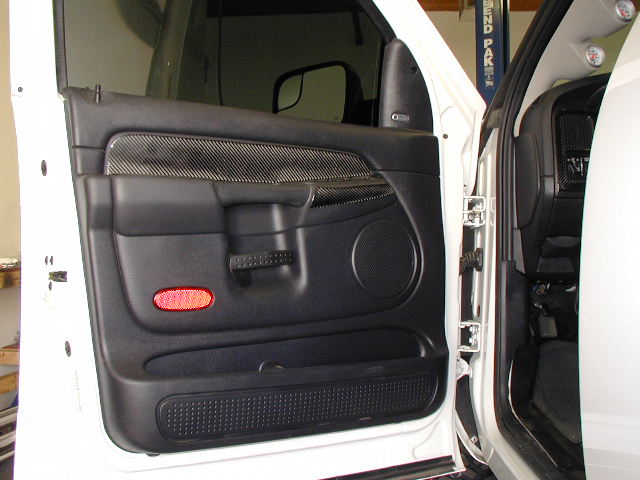
Photo 5
Remove the screws along the bottom edge of the door panel. There are usually two screws.
This is a good time to get a little tray or can to hold your screws so they don't get lost.

Photo 6
Remove screw behind the inside door handle.

Photo 7
Remove door handle by removing the bolt on the inside end of the handle. The screwdriver in this photo is pointing at the bolt to remove. Use a 10mm socket to remove this bolt.
On some vehicles, this may be a Torx head bolt. Use a T-40 size bit to remove it.

Photo 8
Remove the screw at the top inside corner of the trim panel.

Photo 9
Now the panel should be ready to come off. Lift upward and the panel should come free, then pull out and it should be off the door.
Lay the panel somewhere safe.

Photo 10
Gently peel the plastic splash guard away from the door. The black adhesive material can be peeled away from the door and re-stuck on the splash guard for reuse.
Peel back far enough so you can get into the door through the access hole shown here at the upper left part of the door.
For additional light into the door, you can remove the plastic plug on the door jamb. This is optional.

Photos 11 and 12
The top photo shows one handle mounting stud, the second stud would be just out of the photo on the upper right. If your truck has a lock cylinder on each front door, your assembly will resemble this one. If you have locks on both front doors, all of the plates described in this tutorial will work.
The bottom photo shows both mounting studs and also shows a switch that will be on the back of your lock cylinder if your truck has a lock only on the drivers door.
On your truck, check the orientation of the lock pawl, where the rod attaches to the pawl. (Pink plastic clip in the bottom picture.) The lock pawls will be bent in the middle. Some are mounted so that the bend is toward the door metal. If your plates are marked with "072200 A or A1 or B or B1," the lock pawl must be removed from the assembly, and turned over so the bend is away from the door metal to allow for plate clearance. See the next photo for clarification. (This is an easy operation.)
If your plate is marked "072200 C" you will not need to flip the lock pawl.


Photo 13
Do this step only if you've determined that you need to do so from
reading the above description.
To turn the pawl over if needed:
Unhook the handle pull rod from its plastic clip. Unhook the lock
rod from the its plastic clip on the lock pawl. Pull the handle out of
the door as shown. Remove the clip holding the lock pawl on the cylinder,
then remove the pawl from the lock. Next, remove the rod holder clip (pink
here) and snap it into the other side of the pawl. Now put the pawl back
on the lock and replace the clip.
This photo shows the lock pawl after it has been turned over. Note that the bend will be away from the door metal when the handle is put back in the door.
Note: Do not turn the white plastic rotary switch in relation to the lock cylinder. Put it back on exactly as it was removed.
You can now re-install the handle, lock rod and handle pull rod.
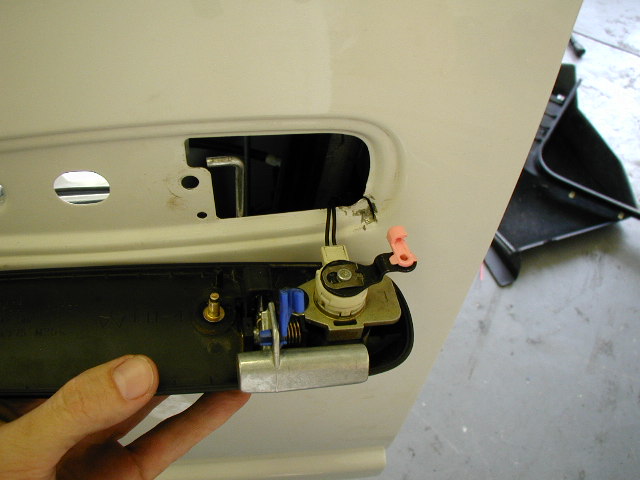
Photo 14
Each plate is marked with "Right" or "Left". Use the Left plate on the drivers side door.
With the handle back in the door but the nuts still off, bring the plate into the door cavity and mount it on the door handle. Make sure the plate doesn't interfere with the lock mechanism. This photo shows typically how this plate style fits on the handle. (For other variations, see the top of this page.)
Put the nuts back on the studs and tighten them down. Make sure all the rods are reconnected. (Not shown here for clarity.)
Test the operation of the lock by using your key in the cylinder.

This completes the installation. You can put the door back together and start the other side.
If the plates you purchased don't look like any of the pictures above, go to the other tutorial HERE.
Have any other questions? Call our toll free tech support line at 1-480-452-6894.
Have a four door truck? Check out our rear door tutorial.